You have landed, the seatbelt sign has gone off, and your phone says it has bars. Yet Google Maps spins like it is trying to remember the route from 2007. That is the classic travel-eSIM moment.
The good news is that a GigSky eSIM with no data is usually a settings problem, not a dead plan. The usual culprits are surprisingly small: the wrong line is selected for mobile data, roaming is off on the travel line, the APN is blank, the phone is still looking for a network, or the plan has not activated because the destination does not match the plan.
Do this first: make sure your GigSky eSIM is switched on, set it as the mobile-data line, turn data roaming on for that line, and confirm the APN is gigsky. Then give the phone a few minutes to register after arriving. GigSky says the first connection in a new country can take up to five minutes while the device finds the local network and confirms access.
Do not delete the eSIM as your first fix. That turns a simple settings check into an installation problem. GigSky specifically advises customers not to delete an eSIM without contacting support.
The two-minute GigSky fix checklist
Work through this in order. Check your data connection after each step.
- Confirm you are in a country covered by the exact plan you bought.
- Turn the GigSky eSIM on.
- Make GigSky the mobile/cellular data line.
- Turn data roaming on for GigSky, not necessarily for your home line.
- Check the APN is
gigskyin lowercase. - Toggle aeroplane mode on for 20 seconds, then off—or restart the phone.
- Wait up to five minutes on first arrival in a new country.
- If necessary, manually select a supported network after asking GigSky support which one to use.
That is the whole core fix. The rest of this guide shows where each switch lives on iPhone and Android, plus what to do when the eSIM will not install or a plan has not activated.
First, make sure it is the right kind of problem
You have no bars at all
This could mean the eSIM line is off, your phone is outside coverage, flight mode is still on, or the device has not picked a local partner network. Do the line and network-selection checks below.
You have bars or 4G/5G but no internet
This is often the data-line, data-roaming or APN setting. It can also mean the plan does not cover the country you are in.
The eSIM will not install
You may have a locked device, no eSIM support, an old eSIM profile limit, a weak Wi-Fi connection, or a QR/activation code that has already been used. Do not keep scanning the same code on different phones.
It worked yesterday but not today
Check plan validity and remaining data in the GigSky app. Then repeat data-line, roaming and APN checks. Local network selection can reset or change as you cross a border.
Knowing which bucket you are in stops you from changing ten things at once and forgetting what fixed it.
Check coverage and plan timing before touching settings
An eSIM cannot connect in a place the purchased plan does not cover. Open the GigSky app and check the plan name, included countries and validity. A Europe plan may not help on a Caribbean stopover. A land eSIM should not be assumed to work on a ship, on a plane or offshore; GigSky sells those as separate product categories.
Activation timing also catches people out. GigSky says you can buy before travelling and install the eSIM in advance, but timing can vary by plan. Its support guidance says some plans start when the eSIM first connects to a supported network, while certain World, Regional or Cruise plans may activate on download or installation if your current location is included.
The safe travel habit is simple: buy early, read the activation note on that plan, install while you still have good Wi-Fi, but only turn the GigSky line on for data when you are ready to use it. If your plan seems active early, check its specific terms rather than assuming all GigSky products behave the same way.
Fix GigSky on an iPhone
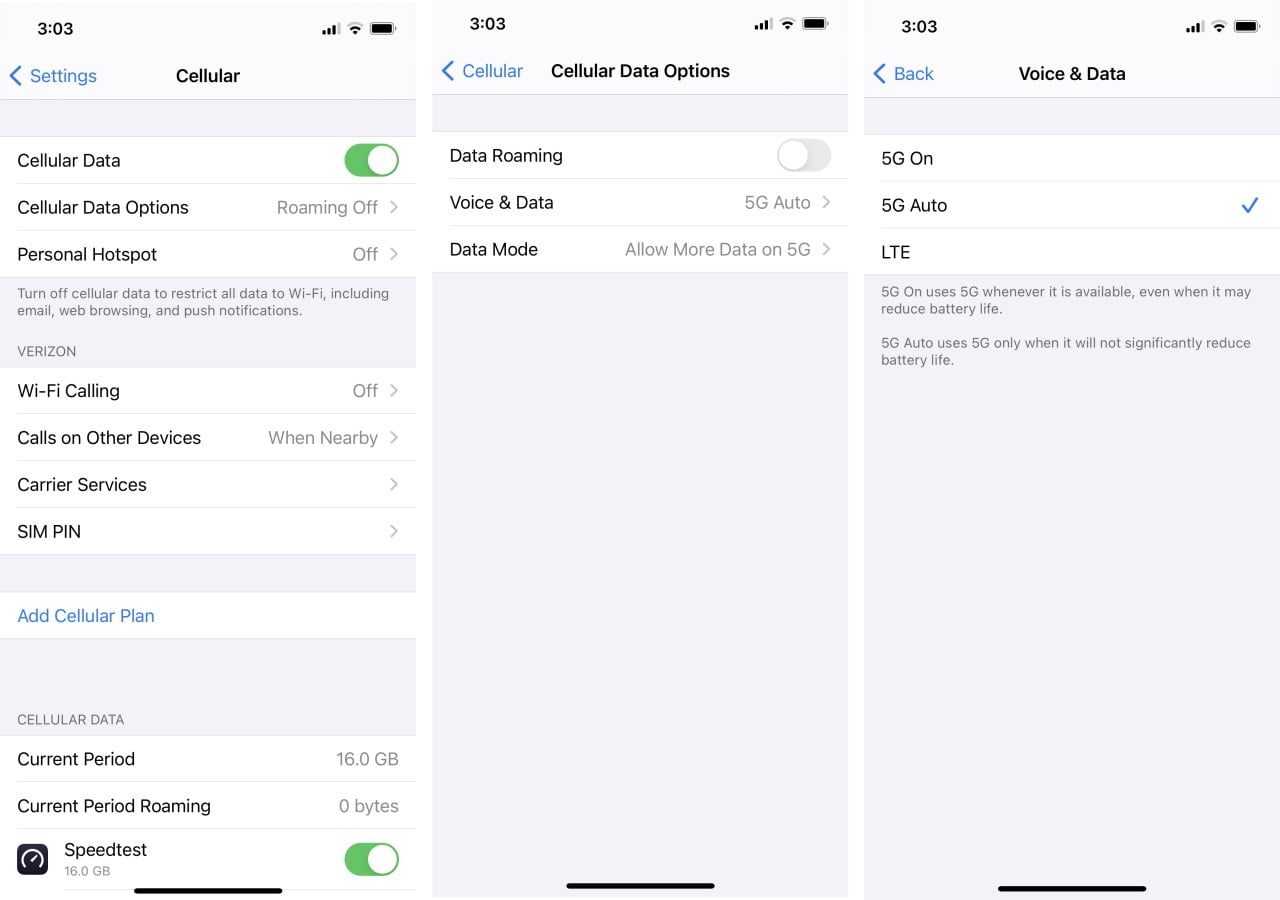
iPhone menu names can differ a little by iOS version. Look for Settings → Cellular or Settings → Mobile Data.
1. Turn on the GigSky line
Go to Settings → Cellular/Mobile Data and tap the line labelled GigSky. If it has an unhelpful label such as “Business” or “Secondary”, rename it to GigSky now. Turn on Turn On This Line.
If you have too many old travel eSIMs, iPhone may limit how many can be active at once. Turn off unused lines before trying to activate GigSky. You normally do not need to delete them just to free an active slot.
2. Make GigSky your mobile-data line
Go back to Settings → Cellular/Mobile Data → Cellular Data and choose GigSky. This is the switch people miss most often. A phone can show a GigSky eSIM is installed while continuing to use your expensive home roaming line for data.
If you see Allow Cellular Data Switching, turn it off while troubleshooting. That prevents the phone from quietly jumping back to your home line when it thinks GigSky is weak.
3. Turn data roaming on for GigSky only
Open the GigSky line and turn Data Roaming on. This sounds backwards, but it is normal for a travel eSIM. GigSky uses partner networks in the destination, so roaming must be enabled on that eSIM for service to work.
Then open your home line and make sure Data Roaming is off if you do not want a home-carrier charge. These are different switches for different lines.
4. Check the APN
From the GigSky line, look for Cellular Data Network. In the APN field, enter:
gigsky
Use lowercase with no spaces. GigSky’s own iPhone installation guide names this APN. If iOS does not show an APN field, do not force random settings from a forum. Continue with the other checks or ask GigSky support.
5. Let the phone re-register
Turn aeroplane mode on for around 20 seconds, then off. If that does not help, restart the phone. Put it near a window or outside for a minute if you have just landed in a concrete airport terminal.
On your first entry to a country, give it time. GigSky says that initial registration can take up to five minutes. Staring at the signal icon does not make the local carrier work faster, sadly.
6. Try network selection only with guidance
If support tells you to do it, go to Settings → Cellular/Mobile Data → GigSky → Network Selection, turn off Automatic, wait for the list, then choose the supported local network GigSky names. Turn Automatic back on later if instructed or if the chosen network does not work.
Do not guess from the list just because a network name looks familiar. A visible network is not always an allowed roaming partner for your plan.
Fix GigSky on Android and Samsung
Android paths vary by brand, but the basics are the same. Samsung usually uses Settings → Connections → SIM manager; Pixel and many others use Settings → Network & internet → SIMs.
1. Switch the GigSky eSIM on
Open SIM manager or SIMs, tap GigSky and make sure Use this SIM is enabled. If prompted to restart and switch, do that only when you are ready to use the travel service.
Give the line a clear name. It is surprisingly easy to select “eSIM 2” for calls when you meant to select it for data.
2. Make GigSky the data SIM
In SIM manager/SIMs, find Mobile data, Preferred SIM or Primary SIM and select GigSky. Then turn on mobile data.
If Dual SIM settings offer automatic data switching, turn it off while diagnosing. You want to see whether GigSky itself works before your phone hides the issue by falling back to the home carrier.
3. Enable roaming on the GigSky eSIM
Open the GigSky SIM settings and turn Roaming on. GigSky’s Android guidance says roaming must be enabled for its service to work. Again, this is for the GigSky line. Keep roaming disabled on your regular line if you want to avoid an unexpected charge.
4. Set or select the APN: gigsky
This is the big Android fix.
On many Android phones, go to Settings → Network & internet → SIMs → GigSky → Access Point Names. On Samsung, try Settings → Connections → Mobile networks → Access Point Names.
Select the existing GigSky APN if you see it. If it is missing, create one:
| Field | Enter |
|---|---|
| Name | GigSky |
| APN | gigsky |
Save it, then select the radio button next to the new GigSky APN. Do not add extra proxy, username, password or authentication details unless GigSky support specifically gives them to you.
5. Refresh the connection
Toggle aeroplane mode, restart the device, then wait a few minutes. Android can take a little time to swap between eSIM profiles and authenticate onto a partner network after arrival.
If it still has no data, confirm the plan location in the GigSky app. A perfectly correct APN cannot fix a destination mismatch.
The eSIM will not install: what to check
Installation is separate from getting mobile data. Do these checks while you have stable Wi-Fi.
Is your phone unlocked and eSIM-compatible?
GigSky says a compatible phone should be carrier-unlocked and show an Add eSIM option or an EID. On iPhone, check Settings → General → About → Carrier Lock; it should say No SIM restrictions. On Android, look for Add eSIM or dial *#06# and look for an EID.
Most iPhone XS-or-later models support eSIM, but many Mainland China models do not. Android support is more variant-specific, especially phones sold by particular carriers. Do not rely only on the model name.
Do you have an available eSIM slot?
Phones limit the number of stored and active eSIM profiles. GigSky says an installation can fail when there are too many old eSIMs. Remove only genuinely unused profiles after you have checked what they are. Keep a screenshot of any eSIM you may need later, and do not delete an active GigSky profile as a casual fix.
Has the QR code already been used?
An eSIM QR code is normally a one-device installation credential, not a reusable ticket. GigSky says its eSIMs cannot be transferred between phones, and re-scanning an already used QR code on another device can trigger an error. If you changed phones, buy or install a plan using the New eSIM Device option rather than trying to move the old profile.
Accidentally deleted GigSky?
Open the GigSky app, go to My Plans, choose the active plan tile and follow the Get new eSIM / Install eSIM flow. GigSky says the in-app replacement method can be used up to two times; contact support after that. This is why “delete and reinstall” should not be step one.
When manual network selection helps
Your phone normally chooses automatically. Leave it that way unless support asks you to test a specific network. Manual selection can help if the phone locks onto a weak or unsupported network after a border crossing.
Before you do it, contact GigSky through the app, web help form/chat or at help@gigsky.com and ask which partner network to choose in your current location. Give them your country and city, the plan name, your phone model, and the exact symptom. That lets them give a useful answer instead of guessing from a generic network list.
What to send GigSky support
If the checklist has failed, send a clean support message with:
- Your GigSky account email and plan name.
- Destination country and city; say whether you just crossed a border.
- Phone brand, model and operating-system version.
- Whether the eSIM installs and whether it shows signal bars.
- A screenshot of the GigSky line’s mobile-data, roaming and APN settings.
- The exact error message, if there is one.
- A note that you have already selected GigSky for data, enabled GigSky roaming and set APN
gigsky.
That saves a lot of reply-and-wait time when you are standing in a station with 3% battery.
Do not confuse a technical fix with a coupon issue
Our current partner codes are ESIMADVICE15 and AFFMAVEN10. If a code is accepted, the discount should show before you pay. But a coupon does not change installation, coverage or APN rules.
We do not claim that either code applies to every GigSky item, including subscriptions, renewals, top-ups, cruise, inflight or offshore plans. See the GigSky coupon page for the current checkout notes, and choose one code only if the live checkout applies it. For setup steps before travel, see how to use GigSky eSIM.
The simple prevention routine for your next trip
Install the eSIM on reliable Wi-Fi before leaving home. Label it GigSky. Save the QR or activation instructions safely, but do not share them. Screenshot your chosen plan and included countries. On arrival, switch GigSky to data, turn roaming on for GigSky only, check the APN, then let the phone settle for a few minutes.
That routine takes less time than buying airport Wi-Fi, and it makes travel day much calmer.
Browse GigSky plans →
GigSky eSIM troubleshooting FAQs
Why does my GigSky eSIM show signal but no internet?
Check that GigSky is selected as the mobile-data line, data roaming is enabled on that line, and the APN is gigsky. Also confirm your plan covers the country you are currently in.
Should data roaming be on for GigSky?
Yes. GigSky’s setup guidance says roaming must be enabled for its eSIM service to work. Turn it on for the GigSky line, while keeping it off for your home line if you want to avoid home-carrier roaming charges.
What is the GigSky APN?
The APN is gigsky in lowercase. On Android, create or select an APN named GigSky with the APN value gigsky if it is missing.
How long does GigSky take to connect after landing?
GigSky says the first connection in a new country can take up to five minutes while the phone finds a network and authenticates access. If it takes longer, use the checklist in this guide.
Should I delete the GigSky eSIM if it does not work?
No, not as a first step. Check data selection, roaming, APN and coverage first. GigSky advises contacting support before deleting an eSIM.
Can I manually choose a network for GigSky?
Yes, but GigSky recommends doing so when support asks and tells you which supported partner to select. A network that appears in the list may not be valid for your plan.
Why will my GigSky QR code not scan on my new phone?
GigSky says eSIMs are single-device and cannot be transferred. An already used QR code may fail on a new phone. Use the app’s New eSIM Device flow or contact support.
Sources and editorial note
Facts last checked 19 July 2026 (page last updated 30 July 2026):
- GigSky QR-code installation and activation guide — iPhone/Android data-line and APN instructions
- GigSky Android eSIM setup guide — Android roaming and APN
gigskyinstructions - GigSky manual network selection guide
- GigSky activation timing guidance
- GigSky eSIM compatibility guide
- GigSky support contact page